Saturday, February 28, 2015

How To: Grow a Peach Tree From Seed, part 4

When I left off last time, I had only barely got 4 more sprouts planted, and two more were waiting until I had room on the window sill.

Just so you can see how they grew, this is what they looked like on Feb 25th before I planted them!


As you can tell, they were in definite need of planting! Well I finally got them planted and they're doing well! 4 out of the 6 I have planted have all started to get tiny sprouts!

It's very nice that they're all growing at different speeds regardless of which method I used. I do have to say I think removing the seed coat helped in my case, but I think if the weather were colder, it'd have been better to leave it on longer.

After a full week has passed, lets see how they've grown!

(these are the two I only just planted a few days ago!)


(these are the two that had started to grow mold)

(these two are only just beginning to show signs of sprouting!)

(this is my original seed. As I mentioned before, he lost most of his leaves)

Because the weather hasn't warmed up any, my plants are all sitting on a chair in the backroom where they can get some sunlight without being so close to the window that they freeze. It's no substitute for outside in warm weather, but the weather has gone from 30 to 70 and back this week.

Let's see how they continue to grow in the weeks ahead!

I wonder, how long until the one that still has it's seed coat begins to root?

Tuesday, February 24, 2015

How To: Grow A Peach Tree From Seed, part 3

When I left off last time, my seed #1 got planted and was growing pretty fast!

Unfortunately since water ended up sitting for too long in the bucket, some of the tiny leaves came off, but D assures me that once the soil dries up, it'll be totally fine! Here's to hoping!

As for groups 2 and 3, they continued to grow in their plastic baggies for another week. 

For the seeds in group two that still have seed coats, their growth is slow and pretty unnoticeable to me. However, for the seeds in group two that were growing mold (that I then pulled the seed coats off of) have grown FAST. It really seems like pulling that seed coat off speeds up the germination process.


(group 2, seed-coat-less after molding)

(group 3, seed coat-less from the start)

As you can tell, the seeds in group 2 seem to be growing much faster than those in group three. I'm not sure if the seed just gets more nutrients that way, or what? But, those remaining in group 2 with seed coats have not budged. 

After just a little less than another week, I took these (Feb 20, 2015) all of those in group two with no seed coat were ready to be planted! As well as just a couple from group 3!


(group 2: look at those roots!)

(group 3: only a couple are ready!)

As you can tell, the roots on group 2's are longer, and they're much more ready for planting than group 3. Plus, a few more of the seeds in group two started getting mold, so away came their seed coats. Only one has the whole seed coat on now, and there has been no noticeable change in it.

I planted all four of the seeds in group two that were ready. Once I get more room on my windowsill, I will plant the remaining ones! Until then, they sit in the window. So far this makes 10 growing seeds out of the 20 I started with. (I did mention I broke several just trying to figure out HOW to break into the peach pits, right?)

We'll see how fast the rest of these sprout, and hopefully I didn't kill my first seed! 

Sunday, February 22, 2015

Seedling One: My, oh my, how it grows!

As mentioned in a previous post, once my first seedling was ready to be planted, it really took off!

Below is a day-by-day of the first week to show you just how FAST this little guy grew!

Day 1: Planting. This is immediately after I planted my sprout in soil.


Day 2:


Day 3:


Day 4:


Day 5:


Day 6:


At the end of week one, this little sprout had almost topped my bucket I have him in! Unfortunately I made a stupid mistake on day 6. Do you see how wet the soil is?

It had been getting into the 70s during the day, and we were going out of town for the weekend. So I figured a little extra water would be okay - since it was getting so warm during the day, I knew a lot of it would evaporate.

Bad news. While we were out of town - a cold front blew through and dropped the weather back down to 30, so the water never evaporated. Instead, it just sat there, all weekend.  When we came home, I got as much excess moisture out as I could without losing all my soil. I had used dirt from the yard, and since it was pouring outside I was in no condition to find dry, warm soil. 

A couple of it's little leaves broke off, but we'll see if it recovers! Here's to hoping!

Saturday, February 21, 2015

How to: Grow a Peach Tree From Seed, part 2

Where I left off last time, I had three different scenarios!


  1. The peach seed that spent a solid 8 weeks in the fridge wrapped in a damp paper towel.
  2. The peach seeds that spent 8 weeks in the fridge in their pits, and were then placed in a damp paper towel and hung in the window.
  3. The peach seeds that spent 8 weeks in the fridge in their pits, and were stripped of their seed coat before being placed in a damp paper towel and hung in the window. 
Since these are all experiments, it's fair to say any of them may work! But my progress thus far is as follows!

For seed 1, who was already rooting when I stuck him in the window, after about a week, he was READY to be planted! Once planted, this little guy takes off! I'll feature it in another post!


As for seed groups 2 and 3, there was little change for the first few days after they made it into the window. We had a cold snap and the weather dropped down into the 30's and after a couple days of that, I started seeing a slight change!

Those in the seed coat (group 2) had very little change, and some of them even started molding! For these moldy ones, I decided to strip them of the seed coat as well, to hopefully prevent the mold from spreading. Well, it sort of worked. The mold didn't spread, but every day I checked on them, I had to wipe the mold off. They continued to grow though!

However, group 3 (no seed coat) were still off-white, but they started growing and getting "swollen". It was a very minute change though, almost unnoticable! And if you looked closely, you could see them starting to separate!


After about another week, All of the seeds who's coats had been peeled were ALL starting to grow and root! For all the seeds that still had seed coats, I saw little to no change. It really seems like removing the seed coat helped them grow!


Friday, February 20, 2015

How To: Grow a Peach Tree From Seed, part 1

I've seen online a lot of people wanting to grow Peach trees from seed, but I've found very few GOOD resources on how.

There's been a lot of confusion for whether or not the pit needs to be broken open, or if you can plant the whole thing whole. If you break open the pit - how are you supposed to break it open without shattering the seed? Seriously, a peach pit is a tough son of a gun to get open!

Lucky for me, our peach tree at home gave me about 20 peaches that I could experiment with to find the best way to grow these little guys!

Today, I'm going to share with you what I found to be the best way to sprout these little seeds. 

To start, peach seeds require some cold time just to get germinated. So for those of us with generally hot weather, the fridge is a perfect alternative. 

First, you're going to need a few materials. You may remember this from your 2nd grade science class when your teacher showed you how to grow a lima bean in the window! It's also called "The Baggie Method"
  1. A plastic baggie that seals 
  2. A damp paper towel (just enough to be wet, but not dripping)
  3. A peach seed.
That's it. THREE things to get your baby peach seed going.

Second, you're going to need to fold your paper towel in half so it can fit in your bag. 

Then, place your little peach seed inside!


Now, all you've got to is fold the paper towel over your seed, stick it in the baggie and set it in the fridge to chill for a while.

I tried this with ONE seed and it took about 8 weeks. The skin peeled off of my seed and what I was left with was a greenish tinted seed that had started to root. 

In the meantime I left every other seed alone in it's pit. 

Some people suggest keeping the seeds in their pits, moist but not enough to mold, in the fridge for a couple months (~8 weeks) so that's what I did with the rest of them - and after 8 weeks I had nothing. The ones in their pits hadn't budged, but the seed that had been released of it's pit did. 

So I decided it was time to free the other seeds from their pits. To be honest, I waited on this because I went through five peach pits before I broke one open without shattering the seed. I finally perfected my method for breaking them open and decided to try again. This time I managed to get 13 seeds out without ANY damage! So, here I now had 13 seeds, in January and not a single one had shown signs of growing. 

I had to do something FAST if I wanted them to be planted for spring!

On this day, January 19th, 2015, I took my sole seed that had been set in the fridge, and moved it to the window. It had a small root and a small green sprout poking out when I moved it. 

As for the rest of my peach pits, I contemplated whether or not I should put them BACK in the fridge to sit for another 8 weeks. D, having grown a LOT more from seed than I have, said there was no need because the seeds should have gotten the temperatures they needed. So into the window they went!

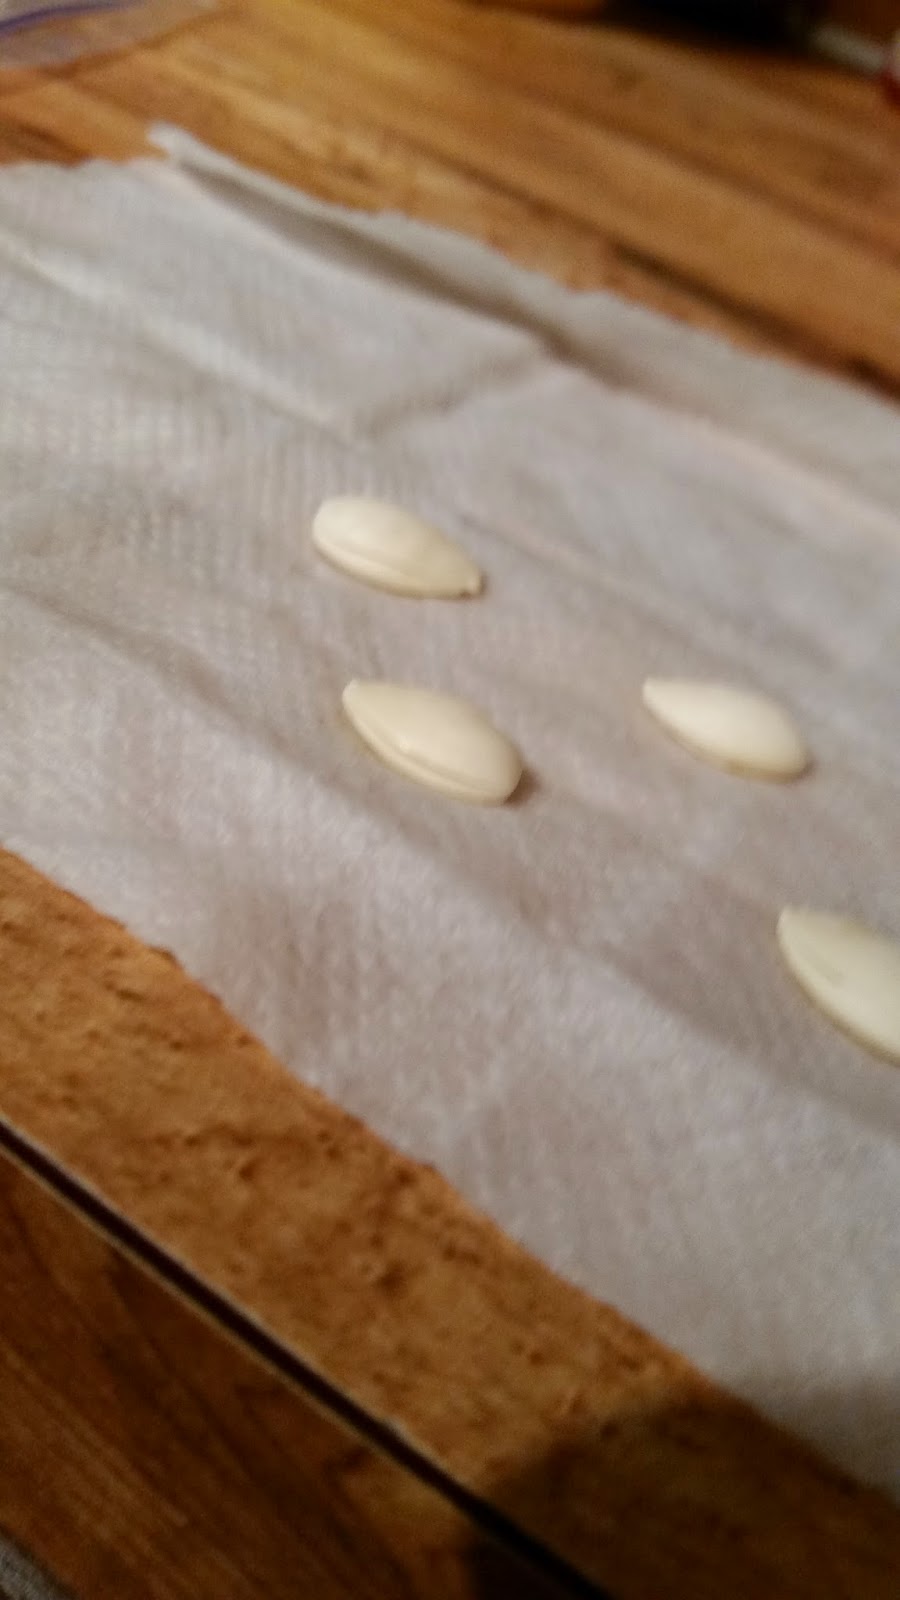
Here I had a thought. I had 13 seeds, none of which had started to root, or anything. So I decided to do a little experiment. Nothing I'd read suggested this, but it really worked, so I'm here to share it with you today!

I took 5 of my 13, and peeled the seed coat off. 

That's right, I PEELED OFF the seed coat.

Some people may say that's tampering with nature, but my little seeds needed some help, so I was happy to give it to them!


That's what they looked like, all naked! 

So into baggies they go!

I'll show you how they turned out later!


Thursday, February 19, 2015

Our Story

Hi there! My name is T.

I started this blog because I wanted to learn how to grow fruits, and more specifically fruit trees from seed. Unfortunately, despite the internet being a wonderful plethora of information - I was unable to find most of the information I needed!

 Well, D, my fiance, and better half, has a pretty rich background in agriculture but even he didn't have the answers for me, so I , have spent most of my time experimenting to find the best, and easiest methods!

How did we get started?

Well, it started when we purchased our first home. Our backyard came fully equipped with 3 apple trees, 2 fig trees, 1 peach tree, and 1 plum tree.

I decided once we started producing our own jelly that I really wanted to keep the peach pits to try and grow more trees. However once I wanted to grow these seeds, I found it nearly impossible to find anything out about them.

So that's why I'm here. To help others who want to grow delicious fruits and veggies from home.

-T-